Showing posts with label Remarkable You. Show all posts

Wednesday, June 8, 2016

Pals June Blog Hop: Pick a "B"...


We are thankful you stopped by to take a look at our new 2016 Blog Hop monthly themes.  This month we are featuring projects that are based on “B“ themes such as Birthday, Bride or Baby. We hope to provide you with lots of ideas and that you enjoy our creations.

You may just be starting the Blog Hop or may have come from the previous link from the Line-up on the Pals Blog Hop listing shown below.  The full lineup will help you move along from blog to blog so you may see all the projects. 

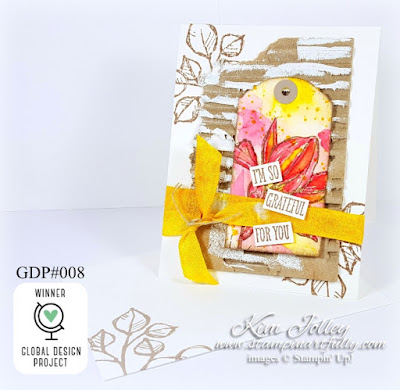
I had started a watercolor project for this blog hop, but wasn't happy with my overall results. The front of the card was to have been entirely watercolored. I quickly realized I could just use parts of the watercolored panel and be quite happy. The cards below are what I came up with. Unless noted, all products are Stampin' Up!


I used one of the butterfly dies from Bold Butterfly Framelits to cut the butterfly shape for the above card. The floral image is from the Remarkable You stamp set and was embossed with White Stampin' Emboss powder.  The design element behind the butterfly is from Swirly Scribbles Thinlits. The messy threads are actually a piece of cheese cloth and the sequins were some from my stash. 


I used the Elegant Butterfly punch to cut this butterfly. Check out the design elements on this one...you won't believe what they are! They are the remnants or extra pieces you have left over when you cut out the long, wavy swirl from the Swirly Scribbles Thinlits. Don't you just love it? You can use those pieces to frame central design points on your card or even the sentiment. The possibilities are endless. Frayed cheesecloth and a single sequin on the body of the butterfly finish this card off. Wink of Stella Clear was used liberally on both cards to give a bit of sparkle. 


Thanks for visiting. To continue with the hop, please refer to the Blog Hop Line-up below. We hope to see you on next month’s Pals Blog Hop! 


Besides Whisper White, these are the colors I used for this project:


Please use the hostess code shown in the top right corner when ordering online, unless your order will total $150 before shipping & tax. At that point, you become your own hostess and get all the rewards! 


As always, let me know if you have any questions about the project or the products used. Thanks for visiting my blog.

Artfully Yours,
Kim


Tuesday, May 3, 2016

Global Design Project 034 ~ Sketch Challenge


I'm playing along with the Global Design Project challenge this week, which is a sketch challenge.


When you are playing along with a sketch challenge, remember it is just a jumping off point. Your artwork doesn't have to literally be just like the sketch. As you can see, mine is a loose interpretation of the above sketch. All products Stampin' Up! unless otherwise noted.


I was so glad the stamp set Remarkable You will be in the new annual catalog. I've really had fun using it with watercolor samples.  For the scruffy looking netting behind the sentiment, I used a piece of cheesecloth. I tapped Versamark on it, then coated it with Gold Stampin' Emboss Powder, then heat set it. I used a skewer to hold it in place while using my heat tool on it. One more tip: if you want to give your layers a real "punch", double up on the Stampin' Dimensionals. See how the colorful layer seems to float over the base card? Stack your dimensionals. 


The "thanks" is from Greetings Thinlits and I'm so sorry to see it on the retiring list! If you have browsed my blog a bit, you will see that I have really used those dies. I would grab them while they are available if you don't own them. The speckles on the background were made with the Gold Wink of Stella Glitter Brush. I simply gave the Wink of Stella a little squeeze and tapped it on the aforementioned skewer while holding both over my project. Voila! Perfect glittery splatters. 

Supply list:


I'm always sad to see some of my favorites on the Stampin' Up! retiring list, (some are up to 50% off) but I am SO excited about the new catalog items available in June! Out with the old...in with the new. Quantities are limited, so order your favorites right away. 

Click this link for a pdf file listing all retiring items. Don't miss out, time is short for the great deals. Or click on the picture below to take you to my on-line store. 


Please use the hostess code shown in the top right corner when ordering online, unless your order will total $150 before shipping & tax. At that point, you become your own hostess and get all the rewards! 

As always, let me know if you have any questions about the project or the products used. Thanks for visiting my blog.

Artfully Yours,
Kim

Friday, March 11, 2016

Watercolor Thank You

Good Morning...

I've been desperately trying to get over a terrible case of the flu. I literally hate that I've been at home and haven't felt like stamping or creating as much as I would have liked. 

I follow an amazing Australian Stampin' Up! demonstrator named Kylie Bertucci. See her blog here.  She is hosting an International Blog Challenge starting today and I decided I would participate. The theme is "Thank You". I personally think that not near enough thank you notes are mailed in this day of email & Facebook, but we should all try harder, right? (This card will go out to one of my customers.) There will be voting during this challenge and 5 lucky participants will win a coveted spot in an International Blog Hop that Kylie hosts. Click on the link above, which will take you to Kylie's blog. Cast your votes...you get to pick your 5 favorites. 

For my entry, I decided on a watercolor card. All products are Stampin' Up! I love the Remarkable You stamp set. The images offer so much inspiration and possibility. 


I decided to use the calla lily image. I inked up the flower portion of the image with Melon Mambo, then used an Old Olive marker to color the stem. Once I stamped it on watercolor paper, I just applied water from the border of the image and pulled color to the center, adding more Melon Mambo when I needed it and using Daffodil Delight for the center portion of the flower. I made my own "paint palette" by tapping each ink pad on the edge of one of my acrylic stamping blocks. A CD case also makes a great palette. 


To add some interest to the background, I sponged Daffodil Delight on top of one of the masks (stencils) from Happy Patterns Decorative Masks, then used one of the Gorgeous Grunge stamps to add what looks like paint splatters. I cut the word using one of the Greetings Thinlits dies. I think using the negative instead of the actual word added some interest to this project. 

Now for a little tip: see what appears to look almost like a twisty tie in the photo below?


I've been playing with seeing how I can break down the properties of a piece of cardstock without just disintegrating it in order to use it for interesting embellishments. I trimmed a very narrow piece of the Melon Mambo cardstock (think skinny strip, maybe an 1/8 inch wide) and slightly wet it. Once it was wet, not soaking wet, just slightly wet, I rolled it back & forth in my hands kind of like you would an ink pen. (while holding it, put your hands together like you are going to clap, then slide your hands back an forth) I haven't ventured in to making videos yet, but this would be the time for one...Once it looks the way you want it to look, let it dry. I painted my piece with clear Wink of Stella to give it a little sparkle. 

I hope you enjoyed this project. Here are a couple of older projects using the same stamp set. Click on the photo to take you to the original blog post. 


Supply list:


Please use the hostess code shown in the top right corner when ordering online, unless your order will total $150 before shipping & tax. At that point, you become your own hostess and get all of the rewards. Don't forget that Saleabration is winding down. You have until March 31 to earn your Salebration freebie(s). Click on the catalog link at the very top of this page to see what your choices are. Please keep in mind if you choose "no contact" from the demonstrator, I'm unable to see your name to send a thank you note.

Thanks,
Kim


Wednesday, November 11, 2015

Pals November Blog Hop: "So Thankful"


Welcome to the Pals November Blog Hop, we’re so thankful you stopped by. This month we’re showcasing projects that feature Stampin’ Up! Thanksgiving and “Thank You” products. We hope you enjoy our creations.

You may just be starting the Blog Hop or you may have come from the previous blog on the Pals Blog Hop listing shown below. The full lineup will help you move along from blog to blog so you can enjoy each and every beautiful project.


This project was pretty simple. I cut a leaf out of watercolor paper using a leaf die from the Stampin' Up! Leaflets Framelits Dies. I watercolored one side of the leaf by using the Pumpkin Pie reinker & water. 


I used the smallest width Project Life Journaling Pen to lightly outline the leaf and go around the perimeter of the top layer of the card. Don't be afraid of this technique, it's not supposed to look perfect!


The black wispies are just very thin cardstock that I curled with my bone folder. The splatter was made using a stamp from the Gorgeous Grunge stamp set. The words were embossed with White Stampin' Emboss Powder and are from the Remarkable You stamp set. I doubled up on the Stampin' Dimensionals to really boost the focal point of this card. Supply list is below. 

Thanks for visiting. To continue with the hop, please refer to the Blog Hop Line-up below. We hope to see you on next month’s Pals Blog Hop!

  1. Jennifer Michalski at Stampin' Serenity
  2. Shawn de Oliveira at Shawn Stamps
  3. Katy McGloin at Just Fun Stamping
  4. Kim Jolley at Stampin' Artfully       (you are here)
  5. Becky Volpp at InkBlossomwithBecky
  6. Peggy Noe at Prettypapercards
  7. Rae Harper at Wild West Paper Arts
  8. Kelly DeTommaso at Kelly's Creative Corner
  9. Beth McCullough at Stamping Mom
  10. Wendy Klein at Doggone Delightful Stampin'
  11. Kalyn Shubnell at The Stamping Chronicles
  12. Jackie Diediker at Stampin' Jackie
  13. Susan Itell at Simple Stampin
  14. Lisa Ann Bernard at Queen B Creations
  15. Pamela Sadler at Stampin Pink Rose
  16. Karen Hallam at Karen's Stampin' Habit!
  17. Mary Fish at Stampin' Pretty
  18. Debra Simonis at Deb's Stampin' Grounds
  19. Nancy Gleason at My Stampin Space
  20. Brian King at Stamp with Brian
  21. Dawn Tidd at Tiddbits from Dawn
  22. Jane Knudsen at see jane stamp
  23. Sherrie Gross at Stampin' Sunshine
  24. Tricia Chuba at ButterDish Designs

Built for Free Using: My Stampin Blog


I hope you enjoyed this blog hop project. Please use the hostess code shown in the top right corner when ordering online, unless your order will total $150 before shipping & tax. At that point, you become your own hostess and get all the rewards! Please keep in mind if you choose "no contact" from the demonstrator, I'm unable to even send you a thank you note for your order...That's right, I'm not even able to see your name. 

As always, let me know if you have any questions about the project or the products used. Thanks for visiting my blog. 

Artfully Yours,
Kim

Sunday, November 1, 2015

So Grateful

I have had two very exciting things happen this morning. Last week, I participated in the GDP008 challenge over at the Global Designs Project blog. It was great fun and I encourage all of you to play along. I found out this morning that I was one of three winners! My project can be found here.  Thanks so much to all of the talented designers over there who continually inspire me.

I have been a member of Splitcoaststampers for many years. If you do not know about this amazing website for papercrafters, check it out. It is chock full of inspiration, tutorials and tons of challenges to get your creative juices flowing. Each week, they feature a stamper. This morning, I was completely humbled to find out it was me.  With all of the talent exhibited on that website, I was completely floored. Please visit my gallery (small, but growing) and CASE one of my projects. Use #FS456 so I will be able to find it and be inspired by your work!


After last week's post using the flower from the Stampin' Up! set Remarkable You, I just couldn't quit thinking about the watercolor possibilities of the images from this stamp set. Look at these amazing images:


This is how I did it...all products Stampin' Up! unless noted. I inked the stamp with Sahara Sand ink, stamped it off once on scrap paper, then stamped it on watercolor paper. This gives you a faint image to paint with your inks. I tapped ink from the colors I had chosen on to one of my acrylic blocks, using the block for my paint palette. Using one of my Aqua Painters, I painted the flower with Cherry Cobbler and Crushed Curry and the stem and leaves with Old Olive and Old Artichoke. To complete the look of this flower, I took a sketch pencil from my stash and traced the image, paying special attention to the details. This really helps the image pop. The rest is pretty self explanatory, but please let me know if you have questions. If you are viewing this blog post via email, you may have to click on over to my blog to see the products I used. 

Products used:

Built for Free Using: My Stampin Blog


Please use the hostess code shown in the top right corner when ordering online, unless your order will total $150 before shipping & tax. At that point, you become your own hostess and get all the rewards! Please keep in mind if you choose "no contact" from the demonstrator, I'm unable to even send you a thank you note for your order...That's right, I'm not even able to see your name. 

Enjoy your Sunday and I hope you have a creative day!

Artfully Yours,
Kim

Tuesday, October 27, 2015

Global Design Project #8 and New Weekly Deals


I had not had the opportunity to participate in the challenges over at the Global Design Project blog until this week. This week's #GDP008 challenge is to CASE the designer, the very talented Kylie Bertucci. We were instructed to be inspired by either the theme, layout, the colors or particular stamp sets. Here is her card:


I ended up using the theme (flowers) and the color combo of Stampin' Up Cherry Cobbler, Tip Top Taupe & Crushed Curry. All products used are from Stampin' Up! including the recycled corrugated cardboard I tore from a Stampin' Up! shipping box. 


I somewhat flattened the corrugated cardboard by running it through my Big Shot between the cutting plates. Then I randomly rubbed Versamark on it and embossed those areas with White Stampin' Emboss powder. I added water & color randomly on the tag before stamping the flower image from Remarkable You on it with Tip Top Taupe and the speckles with Crushed Curry using my most used stamp from the  Gorgeous Grunge stamp set. I then used a barely wet brush to paint the flower with Cherry Cobbler & Crushed Curry. I used the White Signo gel pen to add a few highlights to the flower. I dyed the Whisper White Seam Binding Ribbon with Crushed Curry ink. All in all, I am happy the mixed media look of this card. 

Products used:
Built for Free Using: My Stampin Blog


Click on the image above to check out the new Weekly Deals! Save up to 25% on the items below. There are also still some amazing items on the clearance rack. 

I hope you enjoyed the project. Please use the hostess code shown in the top right corner when ordering online, unless your order will total $150 before shipping & tax. At that point, you become your own hostess and get all the rewards! Please keep in mind if you choose "no contact" from the demonstrator, I'm unable to even send you a thank you note for your order...That's right, I'm not even able to see your name. 

As always, let me know if you have any questions about the project or the products used. Thanks for visiting my blog. 

Artfully Yours,

Kim