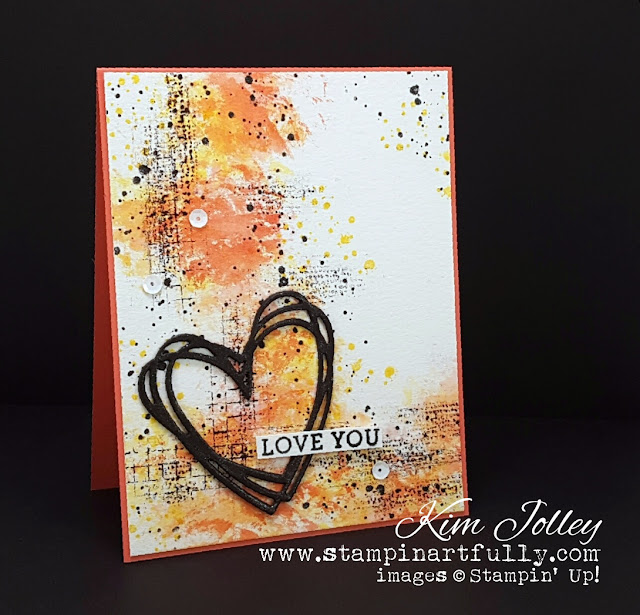
**Edit: I've had so many comments and emails about this technique I am calling #foolproofwatercolor, that I wanted to make sure new blog readers looked at my very first projects I did when I came up with this technique this past November. Click Here for a very interesting bridge scene using the set called Wherever You Go and Here for 3 projects using this technique with the set called Lovely as a Tree. I also used stamps from Timeless Textures for all of those projects. There is a pdf tutorial available on the Lovely as a Tree post, but no video yet. It is in the works. There is also a sample HERE using the Dragonfly Dreams set and the #foolproofwatercolor technique. This technique makes the most gorgeous backgrounds!**
I'm adding a simple video just to show the background technique I used. It's a sample of my #foolproofwatercolor using baby wipes.
The heart was colored a bit with Clear Wink of Stella, but it is hard to see in the photo.
Supply list:
Don't forget to browse the new Stampin' Up! Occasions catalog and Sale-a-bration catalog. Links to the pdf versions are on the right side-bar. For every $50 spent from any catalog (before tax & shipping) you earn a FREE item from the catalog below. The Sale-A-Bration catalog is only good through March 31, 2017.
Do you have a Stampin' Up! demonstrator? If not, I would love to be your source for these amazing products and hopefully give you a good dose of inspiration from time to time. This is not just a hobby for me, it is a passion! Click here or on the header above to find out more info on how you can earn free stamp sets just by shopping with me. Earn Frequent Buy Rewards!
Please use the hostess code shown in the top right corner when ordering online, unless your order will total $150 before shipping & tax. At that point, you become your own hostess and get all the rewards!
As always, let me know if you have any questions about the project or the products used. Thanks for visiting my blog.
Artfully Yours,
Kim


I can't begin to tell you how much I love this card Kim. Your colour choices and the grungy background are just perfect! I really must try this technique myself. So many of my wonderful ladies would love it. TFS ♥
ReplyDeleteThank you so much Paula! Your kind words are much appreciated.
DeleteI love everything about this card ❤ Happy V-day! Hugs, Melina
ReplyDeleteThank you for the inspiration!
DeleteLOVE your card! Wondering if dabbing the baby wipes into your stamp pad will affect it in some way? Or am I misunderstanding how you get the ink on the baby wipes?
ReplyDeleteI've never had a problem whatsoever. Once in awhile, I use a piece of packing tape or other tape to remove any lint that might be left behind on the pad. A lint roller even works! I haven't even noticed really needing to reink that pads any more often than normal.
DeleteNice! Great little tutorial.
ReplyDeleteWow! I love your card! Thank you for the video to show how you did your amazing background!!!
ReplyDeleteThank you for sharing this technique! I've never seen this before and love your results! Beautiful card!
ReplyDeleteLove this card and technique, I must be living under a rock as this is the first time I have seen this technique. I will definitely have to try it. Thank you for sharing.
ReplyDeleteThank you Sherlie! I actually first showcased this technique on this blog on 11/29/16. The cards were a bit more advanced and I only had a pdf written tutorial. I plan on doing more videos with more detailed instruction in the future. Look at the bridge card on 11/30/16, it is pretty cool and one of the ones I frequently get requests for a video tutorial on.
Deletedid you use glossy paper or regular cardstock?
ReplyDeleteI saw Waterpaper on the video.... the first instruction. I'M seaching for the same information... Sorry for my english...
DeleteGuess the best thing to do would be to try it with all three types of paper, regular cardstock, glossy paper and water color paper and see which works the best and which one you like. I didn't find any other information either but will post here if I do.
DeleteLadies...my mistake has been that I have responded to a few questions individually. As stated in the video and in the supply list above, I used watercolor paper for this particular project. Due to the way water or "wet" breaks down fibers on regular cardstock, the blending of the colors doesn't work as well since it disturbs the surface of the paper, but it is not impossible to do. I have not tried glossy with this technique as I do not have any on hand. I do have some Stampin' Up! Shimmery White I plan on trying and will post a project with it if it works. Thanks for stopping by my blog and commenting. Comments are very appreciated!
DeleteThank you for replying and I am glad to know what kind of paper to use.
DeleteWonderful technique. I love your color combination. Thanks for the easy to follow video.
ReplyDeleteThis is stunning thank YOU for sharing
ReplyDeleteKim, I love your Foolproof Watercolor technique! I featured you on my blog today as I tried out the technique for myself. You can read the post here: http://stampwitch.blog/foolproof-watercolor-technique/
ReplyDeleteThank you for the inspiration! This was such a fun technique to do!
Wow! This foolproof method is amazing!! I also love the grunge details and never thought to color bits of it and not the whole thing! Thanks for the great tutorial and inspiration!
ReplyDeletelip gloss with olive oil is the best because it can moisturize your lips as well** Valentine Day Messages
ReplyDelete