Showing posts with label Work of Art. Show all posts

Friday, January 9, 2015

For My Honey

Valentine's Day is just around the corner. For that reason, I've started thinking about what card (cards) I want to make my husband. I am quite enamored with the new Stampin' Up! Stacked with Love washi tape in the 2015 Occasions catalog AND the new word thinlits. 


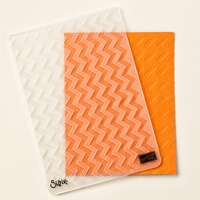
I simply cut & scored the Whisper White card base, then applied the washi tape vertically on the sides before layering up the Kraft panel. I thought the "brush stroke" stamp from Work of Art (embossed with with White Stampin' Emboss powder), made a great back drop for the heart and word. The heart was embossed with the Decorative Dots Textured Impressions folder. 


I had a snippet of left over washi tape that I did not want to go to waste, so I made my own "stamp". This is a great way to carry the design of your card over to the envelope. 


See the tiny flecks of embossing powder around the brush stroke image? This was not intentional, but I quite like it. I even used my embossing buddy first to cut down on the possibility of this happening. However, this is what I have figured out: our Kraft card stock appears to be much more porous than our regular card stock. The extra flecks have nothing to do with static on the paper. In other words, when you stamp on it with Versamark, the image doesn't stay quite as wet as when you stamp on our other card stock with the same ink. Get your embossing powder on there quick and keep in mind that since the image isn't quite as wet, some of the powder may blow on off and give you a very "artsy, I meant to do that" look!

Product used:
Built for Free Using: My Stampin Blog


Don't forget that Sale-A-Bration is going on! Earn yourself a FREE Stampin' Up! product gift with every $50 purchase (before shipping & tax). All the Sale-A-Bration details are HERE.

Enjoy your day...if you wind chill is what mine is, stay warm!

Artfully Yours,
Kim

Thursday, August 7, 2014

Birthday Wishes & Paper Players #207

I'm playing along with Paper Players this morning. I just love this layout. It is simple, but effective. 


First, I stamped the Dictionary background stamp with Baked Brown Sugar ink, then over-stamped a couple of the images from Work of Art with both Baked Brown Sugar and Coastal Cabana inks. The Dictionary background makes a great "filler" when you are needing to add a little background noise to a piece. I am getting a lot of use out of the Work of Art set. It pretty much stays on my table at all times. Then I cut the circles out using the Big Shot with the magnetic (best thing since sliced bread) board and three sizes of the Framelits Circles. Not a pretty picture below, but if you haven't seen the magnetic board in action, it is amazing. I just love how the Framelits stay right where I want them to stay while cutting. 


See the cute button below? Kind of has a watercolor look, doesn't it? I took one of the lightest little buttons from the Neutral Buttons set and colored it with the Coastal Cabana Blendabilities. I started with the lightest marker, then added a bit more of the medium color. I love how it turned out. I think the Linen Thread was perfect with it. Remember, since the Blendabilities are alcohol based markers, they will dry on a non-porous surface. I bet your wheels are spinning now with all the possibilities! I know mine are. It's no wonder I don't sleep very well at night. 


Layered it up with coordinating paper and I thought the Chevron folder really added a nice touch. 


NEW!  BUY A BIG SHOT, GET A BUNDLE!  Up to a $60 value.  Read all about it HERE.


Do something nice for a random stranger today, even if it is just to give them a smile they aren't expecting. You never know how much of a difference you might be making in their day. 


Artfully Yours,
Kim

Sunday, June 29, 2014

Big Announcement...

I have had a love affair with rubber stamping and paper crafting since the late 1990's. I have been making purchases from an amazing company called Stampin' Up! every since I first started stamping. In fact, the very first stamps and inks I ever bought were from that company and I still own them! I have thought about becoming a demonstrator for them for at least 10 years, but timing was never right until now. I am proud to announce that I am now an Independent Stampin' Up! Demonstrator. I will be hosting workshops in my home, friend's homes, your home and public venues. Let me show you products that are superior in quality and are not found in stores any where. Love Pinterest, but not sure how to do those DIY paper projects? Let me show how. I will be demonstrating everything from lovely cards to gift items, home decor and everything in between. With the way Stampin' Up! groups their products and colors, it takes the worry out of putting the right things together and matching and coordinating colors. Anyone can do this. Even those of you who think you do not have a crafty side, let me help you find that side, because I know it's there!

If you want to keep up with my workshop dates and my current projects, please enter your email address (on the side bar) to receive my website updates. By all means, let me know if you are ready to have some fun and make things. My July calendar still has a few dates open. Learn more about the benefit of hosting a workshop here.

The business card below was first printed on my home printer. Then I stamped the images with Stampin' Up! inks and finished them off with matching Brights Candy Dots.The inks are  here. The Candy Dots are here.
The stamp sets are here and here. The tiny envelope (perfect for a gift enclosure card) was made with Sweet Taffy Designer Series Paper located here using the Envelope Punch Board found here.

Artfully Yours,
Kim Jolley